Drawing A Simple Rose: A Friendly Guide For Anyone
Have you ever felt a pull to create something lovely with your hands? Maybe you want to give a special homemade card, or perhaps you just like putting ideas onto paper. Learning how to create a simple rose can bring a lot of joy. It is a flower that many people know and love, after all. You really can make something beautiful without needing years of practice.
There is a real satisfaction that comes from making something with your own effort, you know? A simple rose, with its soft petals and pretty shape, is often a favorite. It feels good to see a drawing take shape from just a few lines. This can be a relaxing way to spend some time, too it's almost a quiet moment just for you.
You might think drawing a flower like this is hard, but it is not. This guide will show you how to draw a simple rose, step by step. We will keep things easy and fun. You can use regular paper and a pencil, or you could try a digital tool. Sketchpad, for instance, is a free online drawing application for all ages. It lets you create digital artwork to share online and export to popular image formats like JPEG, PNG, SVG, and PDF. It is pretty useful, actually.
Table of Contents
- Why Draw a Rose? The Appeal of a Classic Flower
- Getting Ready: What You Will Need
- The Basic Shapes: Building Your Rose
- Step-by-Step: How to Draw Your Simple Rose
- Tips for a Better Rose Drawing
- Exploring Your Artistic Side with Digital Tools
- Frequently Asked Questions About Drawing Roses
Why Draw a Rose? The Appeal of a Classic Flower
Roses have a special place in many cultures, you know. They often stand for love, beauty, or even friendship. Drawing one lets you connect with these feelings. It is a way to express something without using words. A rose just seems to speak to people, and that is a nice thing.
Making a picture of a rose can feel really good. It is a chance to focus on something calm and pretty. You can enjoy the process of watching lines turn into a flower. This kind of activity can help you relax. It is a little bit of quiet time in your day, which is something many people look for, naturally.
The satisfaction of finishing a drawing is quite rewarding. You hold something you made yourself. This can be a card for someone, or just a picture for your wall. It shows what you can do. A simple rose drawing is a fine start for anyone wanting to create art, as a matter of fact.
- Salome Larrea Munoz
- Is Victoria Caputo Still Married
- Vernon Adkison Age
- 1911 Forum
- The Mole Hannah And Tony
Getting Ready: What You Will Need
You do not need a lot of things to start drawing. A pencil and some paper are usually enough. An eraser is also good to have for fixing lines. These are your basic tools for putting ideas down. You can find them just about anywhere, basically.
If you like using computers or tablets, digital tools are an option. Sketchpad is a good choice for this. It is available online and for download on PC and Mac. This means you can draw right on your screen. It is pretty convenient, really.
Sketchpad helps you create digital artwork. You can share your pictures online. It also lets you save them in common image types. These include JPEG, PNG, SVG, and PDF. Sketch mobile is a drawing tool that takes advantage of the new capabilities presented in modern mobile browsers. So, you can draw on your phone or tablet too. It gives you lots of ways to work, you know.
The Basic Shapes: Building Your Rose
Every drawing starts with simple shapes. A rose is no different. You build it up from circles, ovals, and curves. Thinking about these shapes first helps a lot. It makes the whole process less confusing, actually.
We will look at the main parts of a rose. This includes the middle part, the petals, and the stem. Knowing these parts helps you see the whole picture. It is like putting together a puzzle, more or less.
You can use light lines at first. These are just guides. You will draw over them later with darker lines. This way, you can make changes easily. It is a good practice for any kind of drawing, you know.
Starting with the Center
The very middle of a rose is often a tight swirl. It is like a small, wrapped-up bud. This is where your rose drawing will begin. Think of a small, uneven circle, then add a spiral inside it. This is your starting point, as a matter of fact.
This inner part sets the size for your rose. If you make this small, your rose will be small. A larger center means a larger rose. So, consider how big you want your flower to be. It is pretty important, that.
You can use a light touch with your pencil here. These lines are just to get things started. You will refine them later. Just focus on getting that basic swirl shape down, you know.
Adding the Petals
Petals come out from the center. They are like curved cups that overlap each other. Each petal is a gentle curve. They are not perfect shapes, which is good. This makes them easier to draw, honestly.
Think of them in layers. The first layer of petals will be close to the center. The next layer will be a bit bigger. They will go around the first set. This creates a sense of depth, you see.
Make sure some petals go behind others. This overlapping is what makes a rose look real. It gives it that full, layered appearance. You are building it up piece by piece, you know.
Creating the Sepals and Stem
The sepals are the small leaf-like parts at the base of the rose head. They hold the flower up. They are usually pointy shapes. You draw them coming out from under the main flower. They are pretty simple to add, actually.
The stem comes down from the sepals. It is a straight or slightly curved line. This line gives the rose its support. It connects the flower to the rest of the plant. You can make it as long as you want, you know.
Think about how the stem connects. It should look like it is holding the flower. The sepals sit right where the flower meets the stem. This part gives your rose a finished look, basically.
Leaves and Thorns
Rose leaves often grow in groups. They have a distinct shape, usually with jagged edges. You can add a few leaves coming off the stem. They give your rose more character. They are a nice detail to include, you know.
Thorns are small, sharp points on the stem. You do not have to add many. Just a few can make the rose look more like itself. They are a common feature of roses, after all. It is up to you if you want to include them, though.
These details make your rose more complete. They add to the overall picture. You can place them where they look natural. Do not feel you need to draw every single leaf or thorn. Just a few will do, honestly.
Step-by-Step: How to Draw Your Simple Rose
Here is a step-by-step way to draw a simple rose. We will start with very basic shapes. Then, we will add more details. Just take it one step at a time. You will see your rose come to life, you know.
Remember to draw lightly at first. You can always make lines darker later. This lets you make changes without much trouble. It is a good way to work, as a matter of fact.
Step 1: The Inner Swirl
Begin by drawing a small, uneven oval shape. This will be the very middle of your rose. It does not have to be perfect. Next, draw a spiral line inside this oval. It should start from the middle and coil outwards a bit. This forms the tight bud at the rose's core, you see.
This first step is quite important. It sets the stage for everything else. Take your time to get this basic shape down. You are building the foundation of your flower, after all.
Keep your pencil strokes light here. These are guide lines, so you might want to adjust them. Just focus on that central, coiled form. It is the heart of your rose, you know.
Step 2: First Petal Layers
From the outer edge of your initial swirl, draw two or three small, curved lines. These lines should arc outwards and slightly upwards. They will form the first few petals wrapping around the center. Make them look like they are gently folding, perhaps.
These petals should be close to the inner swirl. They create the first layer of the flower's opening. Think of them as soft, rounded shapes. They do not need to be exactly the same size. That is actually better, in a way.
Overlap these petals a little bit. This makes the rose look like it has many layers. It gives it a sense of fullness. You are starting to give your rose its classic look, you know.
Step 3: Outer Petals
Now, add more petals around the ones you just drew. These outer petals will be larger. They should curve outwards and downwards. Think of them as wider, more open shapes. They extend the flower's form, you see.
Make sure these new petals also overlap. Some can go behind others. This creates a natural, full appearance for your rose. Vary their sizes a bit for a more organic look. It is pretty effective, really.
You can add as many layers as you like. Each layer adds more volume to the rose. Keep the curves gentle and flowing. You are giving your flower its shape and presence, you know.
Step 4: The Base and Stem
Underneath the main flower head, draw a small, cup-like shape. This will be the base where the petals meet. From this cup, draw a line downwards for the stem. You can make the stem straight or give it a slight curve. It is your choice, you know.
At the top of the stem, where it meets the flower, draw a few small, pointed shapes. These are the sepals. They usually look like little leaves pointing upwards. They help hold the flower head, so.
The stem gives your rose support. It connects the flower to the ground, in a way. Make sure the stem looks like it can hold the weight of the rose. It is a simple addition that makes a big difference, you know.
Step 5: Adding Leaves
Now, you can add some leaves to the stem. Rose leaves often grow in groups of three or five. Draw a small line coming off the stem. Then, draw oval shapes on either side of this line. Give them a slightly jagged edge. They are pretty easy to draw, you know.
You do not need to draw many leaves. Just one or two sets can be enough. Place them where they look natural on the stem. They add a touch of realism to your rose. It makes the whole plant feel more complete, you know.
Consider the size of your leaves. They should be in proportion to your rose. Not too big, not too small. Just a natural fit. You are giving your flower more life, you see.
Step 6: Finishing Touches
Go over your light lines with a slightly darker touch. This makes your rose stand out. You can add some light shading if you want. Think about where the light would hit the petals. The parts that are folded over might have a shadow, you know.
You can also add tiny thorns along the stem. Just a few small, sharp points. This is optional, but it can make your rose look more real. These small details can really bring your drawing to life, you see.
Take a moment to look at your finished rose. See if any lines need a little cleaning up. You can use your eraser for this. You have created something lovely, you know. It is quite an accomplishment, actually.
Tips for a Better Rose Drawing
Practice helps you get better at anything. The more you draw, the more comfortable you will feel. Do not worry about making mistakes. Every line is a step in learning. Just keep trying, you know.
Look at real roses if you can. See how their petals fold and overlap. Notice how the light falls on them. This helps you understand their shape better. You can learn a lot from just looking, you see.
Do not be afraid to experiment with shading. Even a simple rose can look more real with a bit of shadow. Think about where the light comes from. The parts of the petals that are tucked in will be darker, typically.
If you are using a digital tool like Sketchpad, you can undo lines easily. This means you can try new things without fear of messing up. It is a very forgiving way to draw. This can really help you feel more confident, you know.
Try drawing roses of different sizes. Some small, some large. This helps you get a feel for the shapes. It also keeps things interesting. You can even try different angles, you know.
Exploring Your Artistic Side with Digital Tools
Digital drawing offers a lot of freedom. Sketchpad, for example, is a free online drawing application. It is made for all ages. You can create pictures and share them online. This is a great way to show your work to others, you know.
It lets you save your artwork in many popular formats. These include JPEG, PNG, SVG, and PDF. This means you can use your drawings in many ways. You could print them, or put them on a website, so.
Sketchpad is available online and for download on PC and Mac. Whether you are working on a school poster or brainstorming your next comic book character, Sketchpad makes it easy to bring your ideas to life. It is pretty versatile, actually.
The mobile version, Sketch mobile, uses new features in modern mobile browsers. This means you can draw on your phone or tablet with ease. It is a handy way to create art wherever you are. You can make digital illustrations to share online and export them to popular image formats like JPEG, PNG, SVG, and more, you know.
For example, "Darmowa aplikacja do rysowania online dla wszystkich grup wiekowych, Twórz cyfrowe dzieła sztuki, które możesz udostępniać online i eksportować do popularnych formatów." This means it is a free online drawing application for all age groups, allowing you to create digital artwork to share online and export to popular formats. Also, "Sketchpad: бесплатное приложение для рисования. Для всех возрастов! Создавайте цифровые картины и публикуйте их в Интернете или экспортируйте в популярные." This shows it is a free drawing application for all ages, letting you create digital pictures and publish them on the Internet or export them to popular formats. It is quite a helpful tool, you see.
Learn more about digital art tools on our site. You can explore many ways to create. And link to this
- Vitoria Beatriz Earthquake
- Shepard Smith Partner
- Elizabeth Taylor Grandchildren
- Nice Vaginas
- Senior Swingers

Drawings :: Behance
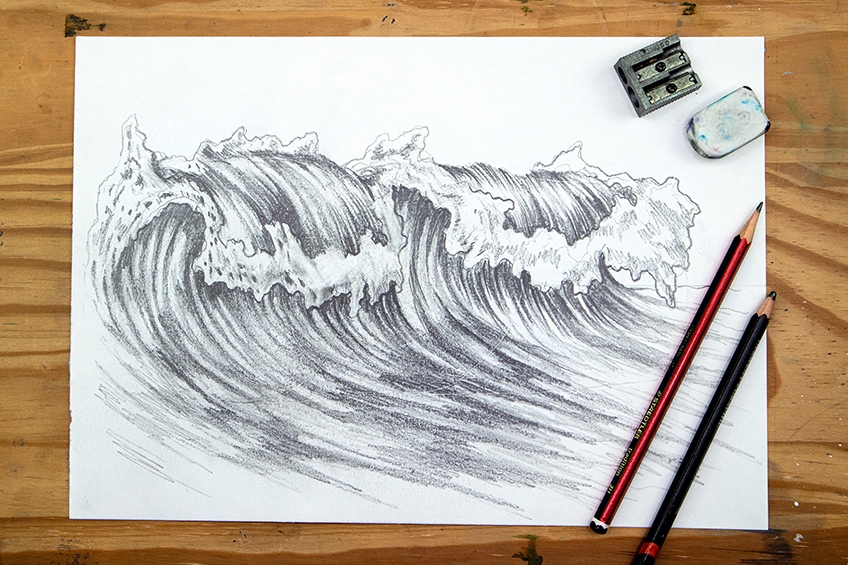
How to Draw Waves - A Realistic Ocean Wave Sketch in Pencil
Free Online Drawing Lessons for Beginners | Drawing Lessons Step By Step

