How To Transplant An Orchid: A Gentle Guide For Thriving Blooms
Giving your orchid a fresh start in a new home can feel like a big step, yet it's often exactly what your beautiful plant needs to keep growing strong and producing those lovely flowers. You see, orchids, like many living things, benefit from a change of scenery and fresh surroundings every now and then. Perhaps its roots are getting a little too cozy, or the potting mix has simply worn out its welcome. Knowing when and how to make this move is a pretty important part of keeping your orchid happy and healthy for a long time.
Many people feel a little nervous about repotting their orchids, wondering if they might somehow harm the plant. It's a very common concern, what with all those delicate roots and the plant's unique growing habits. You might be asking yourself things like, "When is the best time to do this?" or "What kind of stuff do I even put it in?" These are all good questions, and getting the answers makes the whole process much less worrying. We're here to help you feel good about giving your orchid the best possible environment.
Just like any important transplant, whether it's something as significant as a medical procedure or caring for a beloved plant, a thoughtful approach is key. The idea of a "transplant" generally means moving something from one place to another with care, and that careful handling is something that, you know, makes all the difference. From the precise guidelines for human cell, tissue, and organ transplantation initiated by the fortieth World Health Assembly, to the careful planning seen in medical dramas like "Transplant," where a doctor, Bashir Hamed, must overcome challenges in a new country, the concept of a successful transfer hinges on attention to detail. For your orchid, it means being gentle and prepared, ensuring its next home is just right.
- How To Ask For A Spanking
- Best Looking Vagina In The World
- Evangeline Lilly Body
- Xenomorph R34
- What Happened To Geno From Mama June 2024
Table of Contents
- When Your Orchid Says, "It's Time for a New Home!"
- Gathering Your Orchid Transplant Toolkit
- The Right Pot: Size and Material
- Picking the Perfect Potting Mix
- Essential Tools for the Job
- The Gentle Art of Transplanting Your Orchid
- Preparing the Orchid for Its Move
- Removing the Old Potting Mix
- Trimming and Tidying Roots
- Placing Your Orchid in Its New Home
- Adding Fresh Potting Mix
- After the Big Move: Orchid Care Post-Transplant
- Watering Wisdom
- Light and Location
- Feeding Your Freshly Potted Friend
- Common Questions About Orchid Transplants
When Your Orchid Says, "It's Time for a New Home!"
Your orchid will actually give you some pretty clear hints when it's ready for a new pot. One of the most obvious signs is when its roots start growing out of the pot's drainage holes or climbing right over the edge. It's like the plant is saying, "Hey, I'm getting a little cramped in here!" This usually happens every one to two years, depending on how fast your particular orchid grows. So, that's a good thing to keep an eye on.
Another big clue is the condition of the potting mix itself. Over time, orchid bark or moss can break down. When this happens, it holds too much water and doesn't allow enough air to get to the roots. You might notice the mix looks mushy or smells a bit off, kind of sour. This can really hurt the roots, so, you know, fresh mix is a must.
The very best time to transplant your orchid is typically after it has finished blooming and before it starts sending out new growth or flower spikes. This is usually in the spring or early summer. At this point, the plant isn't putting all its energy into flowers, so it can focus on settling into its new surroundings. It's a bit like choosing a quiet time for a big move, when everything else is calm.
Gathering Your Orchid Transplant Toolkit
Before you even think about pulling your orchid out of its current pot, you'll want to have all your supplies ready. Having everything at hand makes the process smoother and less stressful for both you and your plant. It's kind of like preparing for a big project; you gather all the parts first. This way, you can move through each step without having to stop and search for something.
The Right Pot: Size and Material
Choosing the correct pot is pretty important for your orchid's long-term health. Generally, you only want to go up one pot size from its current home. If your orchid is in a 4-inch pot, move it to a 5-inch or 6-inch one. Going too big can cause the potting mix to stay wet for too long, which is really bad for orchid roots. So, picking a slightly larger size is the way to go.
When it comes to materials, clear plastic pots with lots of drainage holes are a very popular choice. They let you see the roots, which is super helpful for knowing when to water. Clay pots can work too, but they dry out faster, which means you might need to water more often. Some people like decorative ceramic pots, but make sure they have good drainage and maybe use a clear plastic liner pot inside. You know, good drainage is key.
Picking the Perfect Potting Mix
The potting mix for orchids is quite different from regular soil; orchids are epiphytes, meaning they grow on trees in nature, not in dirt. They need a mix that allows for plenty of air circulation around their roots and drains water quickly. A good mix prevents root rot, which is a common problem for orchids in the wrong environment. So, getting this right is crucial.
Common ingredients in orchid potting mixes include bark chips (often fir bark), sphagnum moss, charcoal, and perlite. For phalaenopsis orchids, a bark-based mix is usually a good choice. If you live in a drier climate, a mix with more sphagnum moss might be better as it holds more moisture. You can find pre-made orchid mixes at garden stores, and these are usually very suitable. Just make sure it's specifically for orchids, not general potting soil.
Essential Tools for the Job
Having the right tools makes the transplanting process much easier and cleaner. You'll need a clean pair of sharp scissors or pruning shears. These are for trimming any unhealthy roots. Make sure they are sterilized before you start, perhaps by wiping them with rubbing alcohol. This helps prevent the spread of any plant diseases. It's a small step, but it's important.
You'll also want some clean newspaper or a tarp to protect your work surface, as this can get a little messy. Gloves are a good idea too, just to keep your hands clean. A small trowel or even a chopstick can be helpful for gently working the new potting mix around the roots. Having a watering can nearby is also useful for a quick rinse if needed. Basically, having everything ready just makes the job smoother.
The Gentle Art of Transplanting Your Orchid
Now that you have all your supplies, it's time for the main event. Remember, being gentle is the key here. Orchids are pretty resilient, but their roots can be delicate. Taking your time and being careful will help ensure a smooth transition for your plant. This process is a bit like a delicate operation, where each step needs attention.
Preparing the Orchid for Its Move
Before you take the orchid out of its old pot, it's a good idea to water it thoroughly a day or two beforehand. This makes the roots a little more flexible and easier to remove without breaking. A well-hydrated plant handles stress better, too. So, a little drink before the big move is a kind thing to do for your orchid.
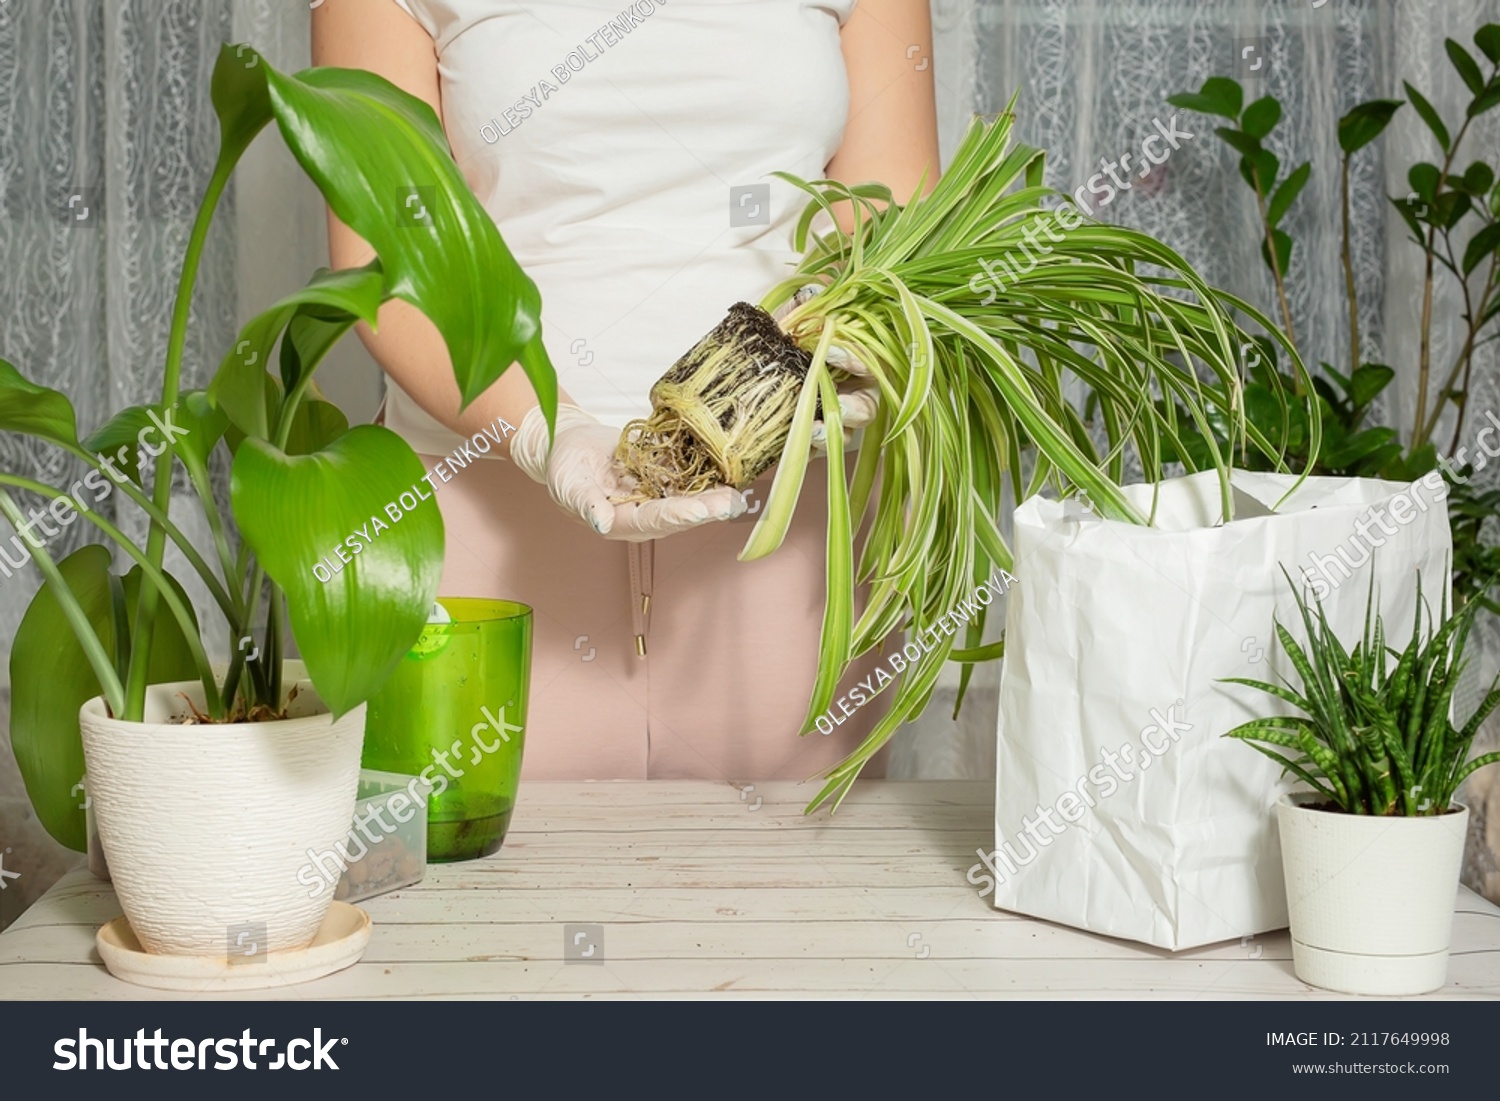
Gently loosen the orchid from its current pot. You might need to squeeze the sides of a plastic pot a bit, or carefully slide a knife around the edge of a clay pot. If the roots are really stuck, you can even soak the pot in water for a few minutes to help loosen them. The goal is to remove the plant with as little root damage as possible. It's almost like coaxing it out.
Removing the Old Potting Mix
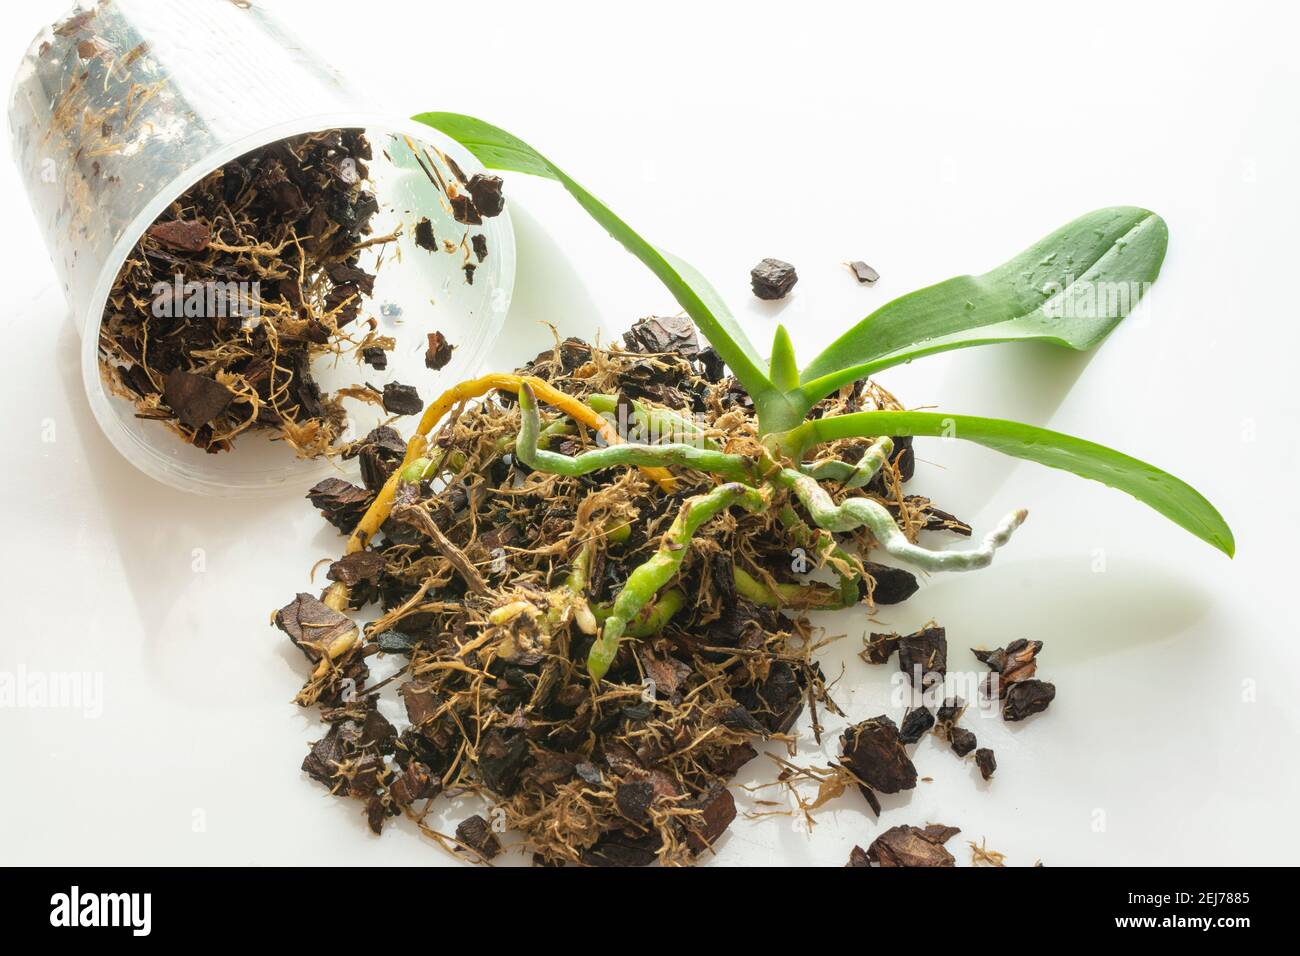
Once the orchid is out of its pot, you'll need to carefully remove all the old potting mix from around its roots. This is important because, as we talked about, old mix can break down and cause problems. You can gently tease it away with your fingers, or use a chopstick to work it out from between the roots. A gentle rinse under lukewarm water can also help wash away stubborn bits. Really, you want to get rid of all that old stuff.
As you're cleaning the roots, take a good look at them. Healthy orchid roots are firm and typically white, green, or silvery. They feel plump. Unhealthy roots will look brown, black, or mushy, and they might feel hollow. This is your chance to give your orchid a thorough check-up. So, pay close attention to what you see.
Trimming and Tidying Roots
Now, with your clean, sharp scissors or pruning shears, it's time to trim away any unhealthy roots you found. Cut off anything that's mushy, black, or shriveled. Make clean cuts. It might seem a bit harsh, but removing these bad roots helps prevent rot from spreading and encourages new, healthy root growth. It's a necessary step for the plant's well-being.
Don't be afraid to remove a fair amount if needed; your orchid will thank you for it later. You can also trim any dead or yellowing leaves at this point, but be careful not to cut into healthy plant tissue. The idea is to give your orchid a fresh start, kind of like tidying up before moving into a new place. Basically, you're preparing it for success.
Placing Your Orchid in Its New Home
Add a small layer of fresh potting mix to the bottom of your new pot. This creates a little cushion for the orchid's roots. Then, center your orchid in the pot, making sure the base of the plant (where the roots meet the stem) is level with or just below the rim of the pot. You want to leave a little space at the top for watering. This positioning is quite important for future growth.
Spread the roots out as evenly as you can within the pot. It can be a bit tricky to get them all to cooperate, but do your best to avoid tightly packing them. The goal is to give them room to breathe and grow into the new mix. So, take your time with this part.
Adding Fresh Potting Mix
Once the orchid is positioned, carefully start adding the fresh potting mix around the roots. Use your fingers or a chopstick to gently work the mix down between the roots, making sure there are no large air pockets. You want the mix to be firm enough to hold the orchid in place, but not so dense that it restricts airflow. Air is very important for orchid roots.
Tap the sides of the pot a few times to help the mix settle. You can also gently shake the pot. Continue adding mix until the pot is full, leaving about an inch of space from the rim. Make sure the base of the plant isn't buried too deeply; it should be sitting right on top of the mix, more or less. This helps prevent stem rot. Learn more about orchid care on our site.
After the Big Move: Orchid Care Post-Transplant
The first few weeks after transplanting are pretty important for your orchid's recovery. It's a period of adjustment, and giving it the right care now will help it settle in and start thriving in its new environment. Think of it as a recovery period, where a little extra attention goes a long way. So, be patient and observant during this time.
Watering Wisdom
Immediately after transplanting, it's generally a good idea to wait a few days before giving your orchid its first full watering. This allows any small cuts or damaged roots to heal and reduces the risk of rot. When you do water, do it thoroughly, letting water run through the pot for a minute or two to ensure all the new mix is moistened. Then, let it drain completely. You know, good drainage is always key.
After that initial watering, adjust your watering schedule based on the new potting mix and pot. Bark mixes dry out faster than moss. Always check the moisture level of the mix before watering again; stick your finger into the mix, or lift the pot to feel its weight. If it feels light and dry, it's probably time for another drink. This careful approach helps prevent both overwatering and underwatering.
Light and Location
For the first few weeks after transplanting, place your orchid in a spot with slightly less intense light than it usually prefers. A little bit of shade can help reduce stress on the plant as it recovers. Avoid direct, strong sunlight, which can scorch its leaves, especially after such a big change. A bright spot, but without direct sun, is usually best. It's like giving it a quiet place to rest.
Maintain consistent temperatures and humidity levels if possible. Avoid placing your freshly transplanted orchid near drafts, heating vents, or air conditioning units, as these can cause sudden temperature changes or dry out the air too quickly. A stable environment helps the orchid put its energy into root growth rather than dealing with environmental stress. So, a calm spot is ideal.
Feeding Your Freshly Potted Friend
It's best to hold off on fertilizing your orchid for about four to six weeks after transplanting. The new potting mix often contains some nutrients, and the plant needs time to establish its roots in the new environment before it can effectively absorb more. Fertilizing too soon can sometimes burn delicate new roots. So, give it a little break from the extra food.
Once your orchid shows signs of new growth, like new leaves or roots, you can resume your regular fertilizing schedule using a balanced orchid fertilizer. Remember to dilute the fertilizer to half or quarter strength, as orchids are sensitive to strong solutions. This gentle approach helps support its continued growth without overwhelming it. Check out our other orchid care tips here.
Common Questions About Orchid Transplants
How often should I transplant my orchid?
You should usually transplant your orchid every one to two years, or when the potting mix starts to break down. You know, the mix looks mushy or smells bad. Another good sign is when the roots are growing out of the pot, kind of like they're trying to escape. This helps keep the plant healthy and gives it fresh nutrients and air.
What if my orchid has no roots left after cleaning?
If your orchid has lost most of its healthy roots, it's a bit of a challenge, but not necessarily the end. You can still try to save it. Pot it in a very small pot with fresh, fine-grade orchid bark or sphagnum moss. Keep the humidity high around the plant, perhaps by placing it in a clear plastic bag or dome, but make sure there's some airflow. This encourages new root growth. So, it's worth a try.
Can I use regular potting soil for my orchid?
No, absolutely not. Regular potting soil is much too dense for orchids and will hold too much water. This will quickly lead to root rot, which is very bad for your plant. Orchids need a special, airy potting mix that drains quickly, like bark chips or sphagnum moss. Using the right mix is very important for their survival. You know, they're just different from other plants.
1,524 Orchid transplant Images, Stock Photos & Vectors | Shutterstock
Transplant orchids. Healthy plant roots. Orchid before transplant Stock
![When To Repot And Transplant An Orchid [All You Ever Need To Know]](https://gardentabs.com/wp-content/uploads/2021/08/Gardener-potting-of-Orchids.jpg)
When To Repot And Transplant An Orchid [All You Ever Need To Know]

